Skateboard wall mount
Our skateboard wall mount is designed to make it as easy and discreet as possible to show off your best boards. Depending on how many decks you have to hang, we have created different packages for you.


Hanging one or more skateboards on a wall can be quite complicated. When you choose to hang it and not skate it, you always want it to look its best. We spent a lot of years hanging our boards with simple solutions like laces, wire, fishing line or any other DIY system before we created our own Tigerclaw wall mount. Let’s take a look at the pros and cons of each of these solutions.
Why hanging your skateboard on the wall?
Many of us sometimes find one or more boards too beautiful to be skated. Whether it’s a collaborative series with our favorite artist, a special collector’s edition (which you may have seen on The Daily Board) or even just a design that speaks to us, sometimes it’s just not something you want to mess with. This is confirmed when, a few years later, we still look at it and think it’s beautiful. Just like a real work of art, the mere sight of it can bring us joy!
It also happens sometimes that the board has a real symbolic value. Whether the graphic represented is a strong symbol of a period in your life, whether it presents your values or your battle or even if it is simply the very first skateboard you ever skated. Whatever your reason, it’s a good excuse not to skate it and hang it in your home (or office). It’s really something we feel strongly about at Tigerclaw. That’s why we want you to have the best ways to hang them.
How do you hang a skateboard on the wall?
Let’s take a look at all the methods that exist today to hang your skateboards on the wall: from the cheapest to the most refined. Spoiler alert: the most elegant is ours!
With a shoelace
This is clearly the easiest solution to set up. But how to hang a skateboard on the wall with a shoelace? You’ll see, it’s a piece of cake! Take one of your old shoelaces and thread it through the holes in the trucks. Your two ends of the shoelace are now well positioned at the back of the board. Now tie a knot with it, trying to make sure the ends of the lace don’t stick out from the bottom of the skateboard. Tie a knot again to secure the board and make sure everything is tight. All that’s left to do is drive a nail or screw into the wall and place the knot over this fastener. Be sure to choose screws that are long enough so that the knot doesn’t come off at first impact.
If we look at its disadvantages, the lace is not ideal for more than one thing. For one, it can be quite difficult to adjust the height when you want to display more than two boards side by side. Even if your laces are the same size, you’ll find that it’s not easy to tie the exact same knots to set them at the same height. Also, you’ll see a big chunk of lace between the two holes, which isn’t very elegant. Finally, there have been times when the lace knot held well for a while, but it gradually unraveled and one day your board fell off in the middle of the night. We are talking about experience and unfortunately the board still remembers this.
With a transparent fishing line
Much more discreet and effective, you can use fishing line to present your skateboard. This wire has the particularity to be transparent, thin and very strong. It is installed in exactly the same way as a shoelace. You pass the wire between the holes of the trucks of the top of the board and make a double knot. Then all you have to do is take your hammer and put in a small nail. Using a screw also works, but since the weight of a board is so low (usually around 1.2kg), a simple small nail is sufficient. You just have to make sure that a good part of it is inserted in the wall.
As with the lace, the problem with this technique is that the board will wobble. It will very easily find itself or shift slightly and will never be perfectly straight. Even with the best will in the world, it will be very difficult to adjust it and keep it from moving. The transparent wire will also be visible on the board’s graphics, between the two holes. It’s a detail, but purists will say it looks bad!
Make your own DIY fastener
It is by far the most time consuming solution, but not the most trivial. Indeed, after testing the two solutions above, you may want to create your own system that will allow you to securely and firmly hang your skateboards on the wall. Some people will want the board to be easily removable from the wall. This might be the case for a skateshop or someone who regularly sells vintage boards. Others will only want to be able to install their boards at the same level. In addition, they will want to make sure that the boards do not fall off due to a bad knot or an unfortunate move.
Whether you want to make it out of wood, plastic or metal, any material is good for creating your own fasteners. The only constant is to choose a material strong enough to hold the weight of the board. However, you need to both think about the right way to do it, create a prototype, test it and see how effective it is. If it is not efficient, repeat the operation until it is successful. This can be a great adventure for the most DIYers among us. For the others, it can be a great waste of time and create a lot of frustration. It’s up to you to see what you can do and how motivated you are.
With our Tigerclaw wall mount
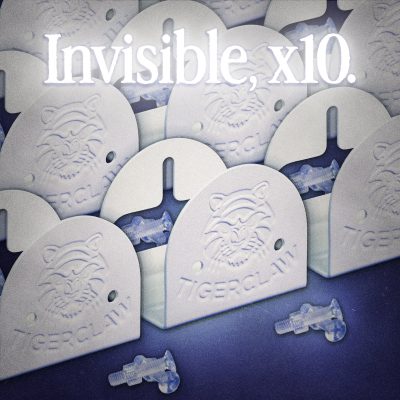
You see, it was through this whole process that we came to want to create the perfect binding. As designers, we laid out everything we were frustrated or unhappy with and thought about how to solve each issue. It’s not nice to have a wire running over the graphic or a big gray or black screw to hang the binding. That’s why we decided to source transparent screws and nuts. When looking at the board from the side, we don’t want to see a piece of wire sticking out or a black wood or plastic element.
Since most of the walls are white, we tried to create the fastener that would blend in the most by making it white as well. And to make it as strong as possible and never break, we decided to make it out of metal. We also chose to give it an elegant shape and make it so that even a young child can install it by himself. Our fasteners also finally make it easy to install multiple boards at the same height. Just make the screw holes in each board the same height.
What is the best method to hang your deck?
We’ve gone over the four ways to hang your skateboard decks on the wall. From simple shoelaces to our Tigerclaw binding, fishing line and creating your own binding system. Firstly, we can say that shoelaces are clearly the cheapest way to hang skateboards, but they are not 100% reliable. The material of the lace itself can’t assure you that the knot will stay strong and won’t come loose one day. Secondly, clear wire is the most discreet solution and will hold much better than lace.
However, its main limitation is that it won’t make the board stand perfectly straight. You will spend your time trying to center the board vertically and horizontally and not necessarily end up succeeding. So you should look into creating your own binding, but depending on your motivation and skills, this can be a perilous path. A binding like our Tigerclaw hanger might be the best method to hang your board straight, secure and simple.
You now know that there are four ways to hang your skateboard on the wall. Each one has its advantages and its defects. It’s up to you to see what suits you best according to your financial means, your desires in terms of rendering, your tools and your time. It’s up to you to find the one that best suits your needs!
Questions and answers:
- How do you hang a skateboard on the wall without drilling?
- What is the cheapest way to hang skateboards?
- How do you hang the front of a skateboard?
- How do you hang a skateboard in a garage?
- How do you hang a heavy board on a wall without drilling?
- How do you hang a skateboard on the wall with a shoelace?